One of the things Android had for a long time were App Widgets. With these small apps, you’re able to create byte-sized functionality that users could use from their home and lockscreen. Since Android 5.0 the support for lockscreen app widgets was removed, while iOS10 introduced them again.
In this article we’ll dive into the way how you can create your own App Widget using Xamarin.Android. This article will cover a Hello World-example which you can take as a start to implement in your next project.
For this demo, I wanted to create a simple app widget which displays an icon, text and the current time. When you click the widget, the time will refresh but when you click the icon, an app will start. Let’s see how we can create such an app widget! The source code can be found on Github.
What we’ll be creating
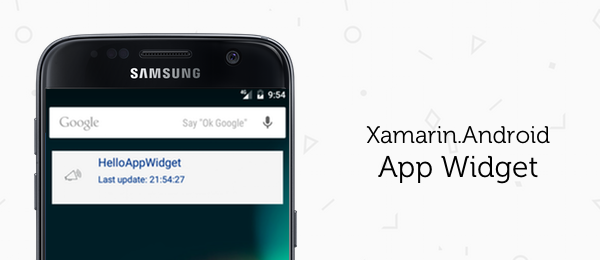
Keeping the requirements stated above in mind, this is what we’ll be creating:

As you can see, it’s a pretty simple example but it just shows you the first steps on how to create an App Widget. Let’s see how you can do that yourself.
The layout
Assuming you already have your whole app solution up and running, let’s add a layout which will represent the app widget. You can add this on a later stage as well, I just find it easier to explain if we start with the layout. So to do this, simply create an AXML file in your /Layouts/ folder of your solution (in my example it’s called Widget.xaml). Here we’ll define the layout – I’ve stripped away any not important parts for now.
<LinearLayout xmlns:android="http://schemas.android.com/apk/res/android"
    android:id="@+id/widgetBackground">
    <RelativeLayout android:layout_width="72dip">
        <ImageView
            android:id="@+id/widgetAnnouncementIcon"
            android:src="@drawable/announcement" />
    </RelativeLayout>
    <LinearLayout>
        <TextView
            android:id="@+id/widgetMedium"
            android:text="HelloAppWidget" />
        <TextView
            android:id="@+id/widgetSmall"
            android:text="Last refresh: 00:00" />
    </LinearLayout>
</LinearLayout>
It simply is an LinearLayout containing the background, which it it place contains the icon and two TextViews. Now that we have our layout, let’s continue in turning it into an widget.
The appwidget-provider-metadata
The first step into turning this into an actual app widget, is to add the appwidget-provider-metadata. As defined in the documentation: The AppWidgetProviderInfo defines the essential qualities of an App Widget, such as its minimum layout dimensions, its initial layout resource, how often to update the App Widget, and (optionally) a configuration Activity to launch at create-time.
To create this metadata, simply create an XML file with the appwidget-provider-element. In this example, I’ve added an appwidgetprovider.xml to the /Resources/XML/ folder. This file contains the following:
<appwidget-provider xmlns:android="http://schemas.android.com/apk/res/android"
	android:minWidth="288dip"
	android:minHeight="72dip"
	android:resizeMode="horizontal"
	android:minResizeWidth="144dip"
	android:updatePeriodMillis="1000"
	android:initialLayout="@layout/Widget"
	android:previewImage="@drawable/previewImage" />
This is a crucial part of turning it into an widget, so let’s briefly go over the most important attributes:
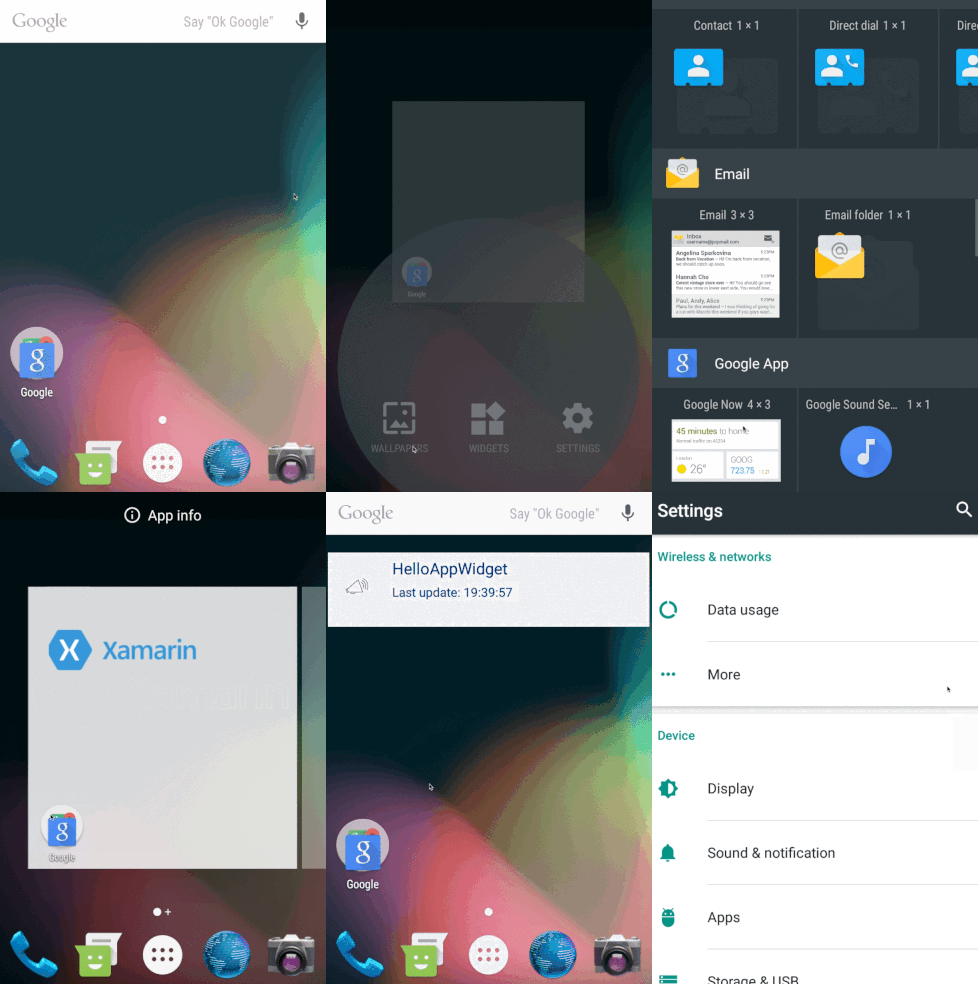
initialLayout: The layout location for the widget that we defined in our previous step.previewImage: This is the image that you’ll see when selecting the widget in the widget overview (in my example, the Xamarin logo).updatePeriodMillis: This is how often Android should update the widget. Sadly you can’t set this to a value that’s too low, otherwise the widget will drain too much battery. This has a minimum value of 30 minutes. I just set my value lower, since the user can overrule this value manually by clicking on the widget and forcing it to refresh.
Now that we have our metadata defined, let’s dive into the next step to add more functionality to make it work.
The AppWidgetProvider-class
When developing for (native) Android, we would have to add stuff to our Manifest to tell Android there is an App Widget available. Luckily, since we’re using Xamarin, this can be done for our using the correct attributes above our classes. Simply create a class in your solution (in my example: AppWidget.cs) which has the following content:
[BroadcastReceiver(Label = "HellApp Widget")]
[IntentFilter(new string[] { "android.appwidget.action.APPWIDGET_UPDATE" })]
[MetaData("android.appwidget.provider", Resource = "@xml/appwidgetprovider")]
public class AppWidget : AppWidgetProvider
{
    public override void OnUpdate(Context context,
        AppWidgetManager appWidgetManager, int[] appWidgetIds) { }

    public override void OnReceive(Context context, Intent intent) { }
}
The Attributes on top of the file are needed to make the nescessary changes to the Manifest. You’ll also see the inheritence with AppWidgetProvider, which allows us to override the OnUpdate and OnReceive methods for the widget. Let’s start by filling in the OnUpdate-method and retrieve our layout:
public override void OnUpdate(Context context, AppWidgetManager appWidgetManager, int[] appWidgetIds)
{
    var me = new ComponentName(context, Java.Lang.Class.FromType(typeof(AppWidget)).Name);
    appWidgetManager.UpdateAppWidget(me, BuildRemoteViews(context, appWidgetIds));
}

private RemoteViews BuildRemoteViews(Context context, int[] appWidgetIds)
{
    var widgetView = new RemoteViews(context.PackageName, Resource.Layout.Widget);

    SetTextViewText(widgetView);
    RegisterClicks(context, appWidgetIds, widgetView);

    return widgetView;
}
Over here, you see the App Widget Manager retrieve the correct widget to work with and build the remove view. Let’s see how the private SetTextViewText and RegisterClicks methods work.
Set text
Since we’re working with RemoteViews, we sadly can’t use FindViewById. We’ll need to access the layout through this RemoteViews in order to update it:
private void SetTextViewText(RemoteViews widgetView)
{
    widgetView.SetTextViewText(Resource.Id.widgetMedium, "HelloAppWidget");
    widgetView.SetTextViewText(Resource.Id.widgetSmall,
        string.Format("Last update: {0:H:mm:ss}", DateTime.Now));
}
As you can see, the first text is just static. The second one is more dynamic and is being updated to the last updated time of the widget (manually by click or automatically by the updatePeriodMillis. At this point, we already have a very basic version of a app widget that we can use and change text on! But let’s take it one step further and add some click-events.
RegisterClicks
Now we’ll need to register the manual clicks on the widget. We’ll need to use an Intent to get that to work with a specific action. We’ll need to bind this to the background from the layout.
private void RegisterClicks(Context context, int[] appWidgetIds, RemoteViews widgetView)
{
    var intent = new Intent(context, typeof(AppWidget));
    intent.SetAction(AppWidgetManager.ActionAppwidgetUpdate);
    intent.PutExtra(AppWidgetManager.ExtraAppwidgetIds, appWidgetIds);

    // Register click event for the Background
    var piBackground = PendingIntent.GetBroadcast(context, 0, intent, PendingIntentFlags.UpdateCurrent);
    widgetView.SetOnClickPendingIntent(Resource.Id.widgetBackground, piBackground);
}
Now each time the background gets clicked, the OnUpdate-method gets called again which results in an update of the Layout. To take this one step further is being able to click on a button in the widget and act on that, for example: open up another app. Let’s see how we can achieve that!
private static string AnnouncementClick = "AnnouncementClickTag""";

private void RegisterClicks(Context context, int[] appWidgetIds, RemoteViews widgetView)
{
    widgetView.SetOnClickPendingIntent(Resource.Id.widgetAnnouncementIcon,
        GetPendingSelfIntent(context, AnnouncementClick));
}

private PendingIntent GetPendingSelfIntent(Context context, string action)
{
    var intent = new Intent(context, typeof(AppWidget));
    intent.SetAction(action);
    return PendingIntent.GetBroadcast(context, 0, intent, 0);
}

public override void OnReceive(Context context, Intent intent)
{
    base.OnReceive(context, intent);

    // Check if the click is from the "Announcement" button
    if (AnnouncementClick.Equals(intent.Action))
    {
        // Open another app
    }
}
As you can see, this step is a little bit more complex. We’ll need to define a static Tag and add that to the Indent. On the OnReceive-method from the Widget we’ll need to check if this was the actual Indent we just clicked.
Conclusion
That’s all there is to it, we now have met our requirements to create a very simple Android App Widget! From here on out you can take more steps to configure the widget to your needs. I hope I showed you the simplest way to create a very basic app widget. If you’re going to try it yourself, please take note of the Android App Widget design pattern as well. Don’t forget to poke around in the example code on Github and tell me what you think through Twitter!


16 comments On How to make an App Widget with Xamarin.Android
Have you some example about configuration activity with xamarin android widget?
Hi, first of all great tutorial! Helped me a lot! But I have a Question. Is there a way to instead of having “Last Update: 00:00”, a Countrdown? I want the Widget to show the time that is left until a Game is release and in my App its working, but the Widget doesnt show the Timer. Maybe because its not Updating?
how can we use custom fonts in widgets?
Very nice tutorial!
Thank you for this.
I cannot see the branch with the clickable button in the widget on GitHub. Did you commit that?
It’s already part of the code on GitHub! Check the AppWidget.cs-file around line 74. Good luck!
This was a great article.
Could you please create a topic guide about create Widget button to turn On or Off flash, bluetooth!
Thank you!
How to craete more than one Widget for Xamarin.Android, Thank!
How to handle more than one button on Widget like A Music Player on Widget or A Calculator on Widget?
Thank!
Thank you for this tutorial!
How we can update UI of widget from viewmodel ?
Great tutorial, but can you please update it, since Android now limits background updates. I have found some comments that say to use JobIntentService, but I can’t get it to work.
Pingback: Is it possible to add an Android widget to app in Uno Platform? – Ask Android Questions ()
Are you sure this doesn’t work on the lockscreen? Samsung’s music player shows up there, as well as the BBC Sounds app. While the first is tied to the OS maker, the last isn’t. I’m running Android 12 here on a Samsung phone.
This did not work for me. No error but widget not showing in the list of widgets