For this tutorial, we’ll add something neat to my previous tutorial about augmented reality. In my opinion, AR itself is already pretty awesome, but this time we’ll add some more interaction between the real world and the AR world. We’ll achieve this by adding virtual buttons to the scene, which simply means that we add buttons to the AR world, which can be touched in the real world. How cool is that!
Since we’re building on top of the previous tutorial, we’ll be using the same technology from Vuforia. They make it pretty easy for us to achieve this effect. Let’s get started!
Prerequisites
In order to get your application working like this, you’ll need to have the following:
- Any existing & running AR application, for example the Intro application.
- (Basic) knowledge about C#; that’s the language Unity uses, which we’ll program our buttons in.
- Another 3d model to render, so we can switch between the several models. I’ll be using more models from Tekken Tag Tournament.
When you’re all set to go, let’s continue with the following steps!
Import the model
Just like with the previous tutorial, you can to import your model the following way:
- Right-click the Assets-folder in the Project
- Select "Reveal in Finder" (Probably "Reveal in Explorer" on a Windows machine)
- Open the Assets-folder
- Create a new folder named Models (or any other, logical name)
- Place the model (incl. all the textures etc.) inside this folder
- Go back to Unity
Unity will detect the changes you’ve made to the Assets-folder, and will update itself with the latest information.
Now drag your model into the augmented reality scene, on top of the previous model. Make sure it’s placed beneath the correct ImageTarget in the Hierarchy. I also copied (almost) the same Transform properties as the previous model, so they would have the same size (only the rotation is different). You’ll end up having something like this.
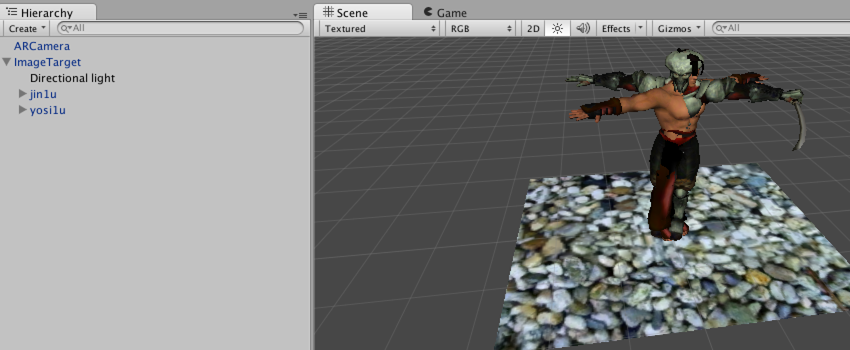
As you see, it does look a little bit weird for now. Using our virtual buttons later, we’ll make sure to hide / display the correct model, so they won’t overlap each other.
Take a moment to check out the names of the models. You’ll find them in the Hierarchy, and you’ll need them later on. Mine are: jin1u and yosi1u.
Adding the virtual buttons
Now, we’ll need to add the virtual buttons to the scene. In your Project windows, open the Assets/Qualcomm Augmented Reality/Prefabs-folder. Here you’ll find the VirtualButton; drag it to your scene. Make sure it’s placed as a child under your ImageTarget in the Hierarchy. In essence, the virtual button can’t be seen when viewing the ImageTarget in AR, so it’s invisible. The default color for Transparent objects in Unity is light blue, so when adding the virtual button to the scene, it’ll probably have that same colour.
The virtual button is a rectangle that you can Transform into the size you want the hit area and location to be. Just make sure the area covers enough features of your ImageTarget; Vuforia simply detects if those features are hidden, and detects it as a button press. This was my result.
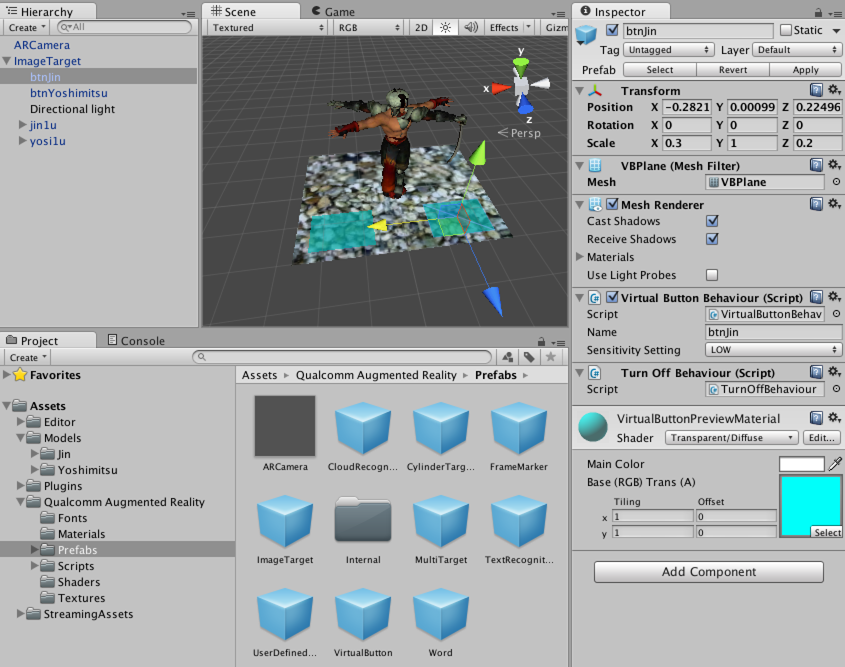
The left button will be used to display Yoshimitsu, the right button to show Jin. Take note of the name of the buttons: btnJin and btnYoshimitsu, since we’ll need them later. In the Inspector, there is also a section called Virtual Button Behavior (Script). Make sure you enter the name of the button there as well, and you might want to change the Sensitivity of the button there as well.
Script the buttons
The buttons don’t do anything (yet), so we’ll need to code something for them to respond. We’ll need to create the script for that.
- Right-click the Assets-folder in the Project
- Select "Reveal in Finder" (Probably "Reveal in Explorer" on a Windows machine)
- Open the Assets-folder
- Create a new folder named Scripts (or any other, logical name)
Inside that folder, create a new, empty file called TekkenVirtualButtonEventHandler.cs (or something else you find suited for this class). The skeleton code for this class will look as follows:
using UnityEngine;

public class TekkenVirtualButtonEventHandler : MonoBehaviour, IVirtualButtonEventHandler
{
    /// <summary>
    /// Called when the scene is loaded
    /// </summary>
    void Start() { }

    /// <summary>
    /// Called when the virtual button has just been pressed:
    /// </summary>
    public void OnButtonPressed(VirtualButtonAbstractBehaviour vb) { }

    /// <summary>
    /// Called when the virtual button has just been released:
    /// </summary>
    public void OnButtonReleased(VirtualButtonAbstractBehaviour vb) { }
}
The most important thing in this class is the IVirtualButtonEventHandler interface. This makes sure the OnButtonPressed and OnButtonReleased methods are implemented in this class. In this tutorial, we’ll leave the OnButtonReleased method empty, since we won’t be using it, but we need to have it in the class because of the interface. This script will later on be attached to the ImageTarget.
First, we’ll need to register the buttons as an active event. We’ll add the following to the Start method (comments have been added):
// Search for all Children from this ImageTarget with type VirtualButtonBehaviour
VirtualButtonBehaviour[] vbs = GetComponentsInChildren<VirtualButtonBehaviour>();
for (int i = 0; i < vbs.Length; ++i) {
    // Register with the virtual buttons TrackableBehaviour
    vbs[i].RegisterEventHandler(this);
}
The next thing we’ll need to do, is find and store the models (GameObject in code) in the scene. First, we’ll create two private fields for the class:
private GameObject _modelJin;
private GameObject _modelYoshimitsu;
And we’ll assign them inside our Start-method. You can find these objects using the same name as the models found in the Hierarchy set before in Unity:
_modelJin = transform.FindChild("jin1u").gameObject;
_modelYoshimitsu = transform.FindChild("yosi1u").gameObject;
We don’t want to show Jin during the startup, so we’ll hide him at first. This makes up the last line of our Start-method:
_modelJin.SetActive(false);
Now on to our OnButtonPressed-method! As you can see, the first and only argument of that method passes along the button that has been pressed. We can utilize that info to display/hide the correct model. We’ll be using the button name set before in Unity to do this. Here’s the implementation:
switch(vb.VirtualButtonName) {
    case "btnYoshimitsu":
        _modelJin.SetActive(false);
        _modelYoshimitsu.SetActive(true);
            break;
    case "btnJin":
        _modelJin.SetActive(true);
        _modelYoshimitsu.SetActive(false);
            break;
    default:
        throw new UnityException("Button not supported: " + vb.VirtualButtonName);
            break;
}
You might want to clean up my code a little bit, but I hope you get the point. Save the class at this point. The full implementation of the class can be found here.
Attach script to the ImageTarget
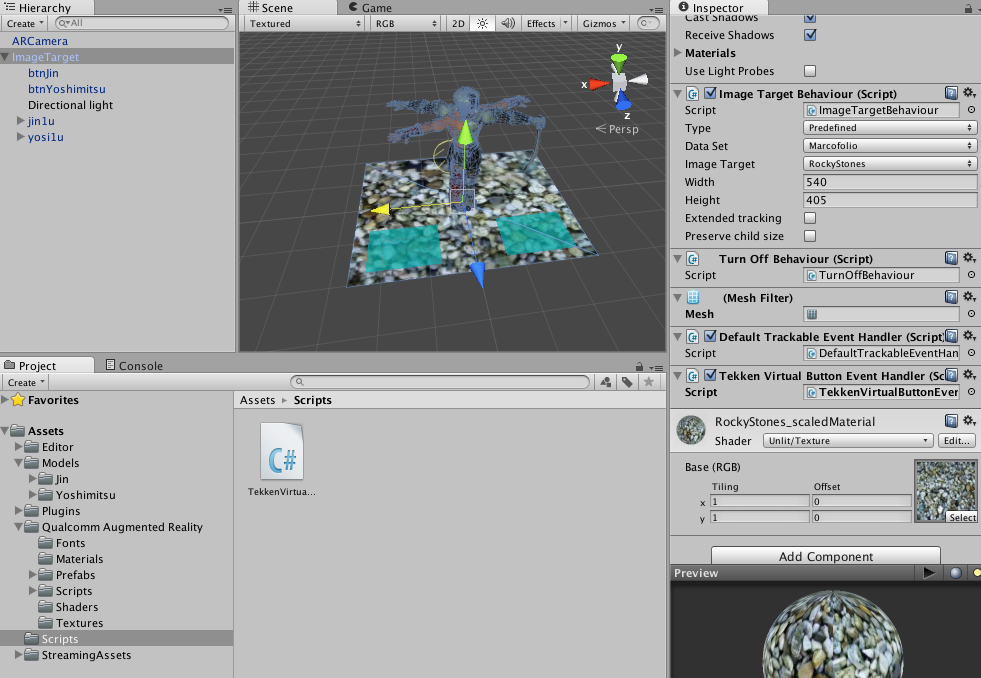
Now go back to Unity. The program will automatically find the Scripts-folder you created, together with the TekkenVirtualButtonEventHandler. Simply drag the script on top of your ImageTarget inside the Hierarchy, and the connection will be made. You can verify this using the Inspector while the ImageTarget is selected; you’ll be able to see the Button Event Handler attached.
That should do the trick! Now compile and build your solution, run it on your mobile device (see my previous tutorial on how to do this) and you should be ready to go. Good luck!
Conclusion
At this point, we have working hit area’s for our virtual buttons. Since they are invisible, you might want to add the following:
- Either change your ImageTarget to have printed buttons (so you’ll see them in the real world), or
- Add Panes on top of the VirtualButtons in Unity with text (so you’ll see them in the Augmented Reality world)
I did the latter, just so I didn’t have to print the ImageTarget again. The downside of this, is that your hand in the AR world appears underneath the button. Other than that, it works as expected.
For some more advanced example of usage with virtual buttons, I recommend the official tutorial for Virtual buttons in Unity by Vuforia. It gives more details on how to create and delete virtual buttons at runtime, as well as tying virtual buttons to other game objects.
So, what do you think? In my opinion, once you get the hang of it, adding virtual buttons using Vuforia to an Augmented Reality world is pretty easy. The end result is fun as well! As you can understand, you can do more than just showing/hiding models; you can start animating them, rotating them, changing textures etc. What will be your next step?